Are you new to Pagico? Would you like to learn the best ways to use it and maximize your productivity? Then this guide is for you! As part 1 of this Getting Started guide series, this article will focus on the basic stuff.

Creating a database
After installing Pagico on your computer, the first thing to do is to create a database. If you’re like most people, you’ll probably just need one database and manage everything in it. Just name it “Main”, or “Work”, and save it somewhere you know. Your “Documents” folder is a good start.
Once the database is created, Pagico will automatically open it. In the future, whenever you launch Pagico, it will try to automatically open this database for you.
Now you’re ready to get stuff done!
Capturing stuff into Pagico
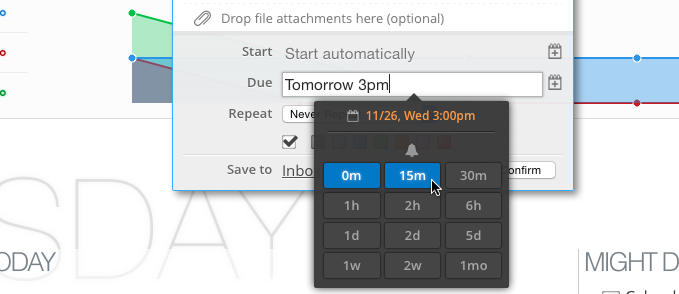
In Pagico, you can store & manage literally everything. Notes, tasks, checklists, and of course, files. To create a new task, simply click on the “+” button at the lower left corner and choose “New Task”. Let’s create a dummy task and set a due date/time. You can use the date picker icon to select a date, but definitely try typing in the field instead. The due date field can intelligently parse your input on-the-fly. Try entering dates like this: “Tomorrow 3pm”. Once you entered a time, you’ll have a number of reminder options.

Getting reminded
Simply enable the corresponding buttons to get reminded at the specific times. For example, “0m” is alarm at the set time, while “15m” is an alarm at 15 minutes prior, and “2d” is an alarm 2 days prior. You can easily select all the alarms you need with just a few clicks. Handy, isn’t it?
Saving to Inbox (by default)
The default destination of your new task is your Inbox, the ideal place for errands, small & random stuff that don’t belong to any projects or contacts. Or, if you have something important on your mind but don’t have a plan yet, store them in your Inbox, too. You’ll be able to move them to projects or contacts later, if necessary.
Attaching emails & files
Want to include an email message or a file attachment in this new task? Simply drag and drop it into Pagico now (you can also link to files later on as well). Then hit Confirm button to save the task.
Reviewing your schedule
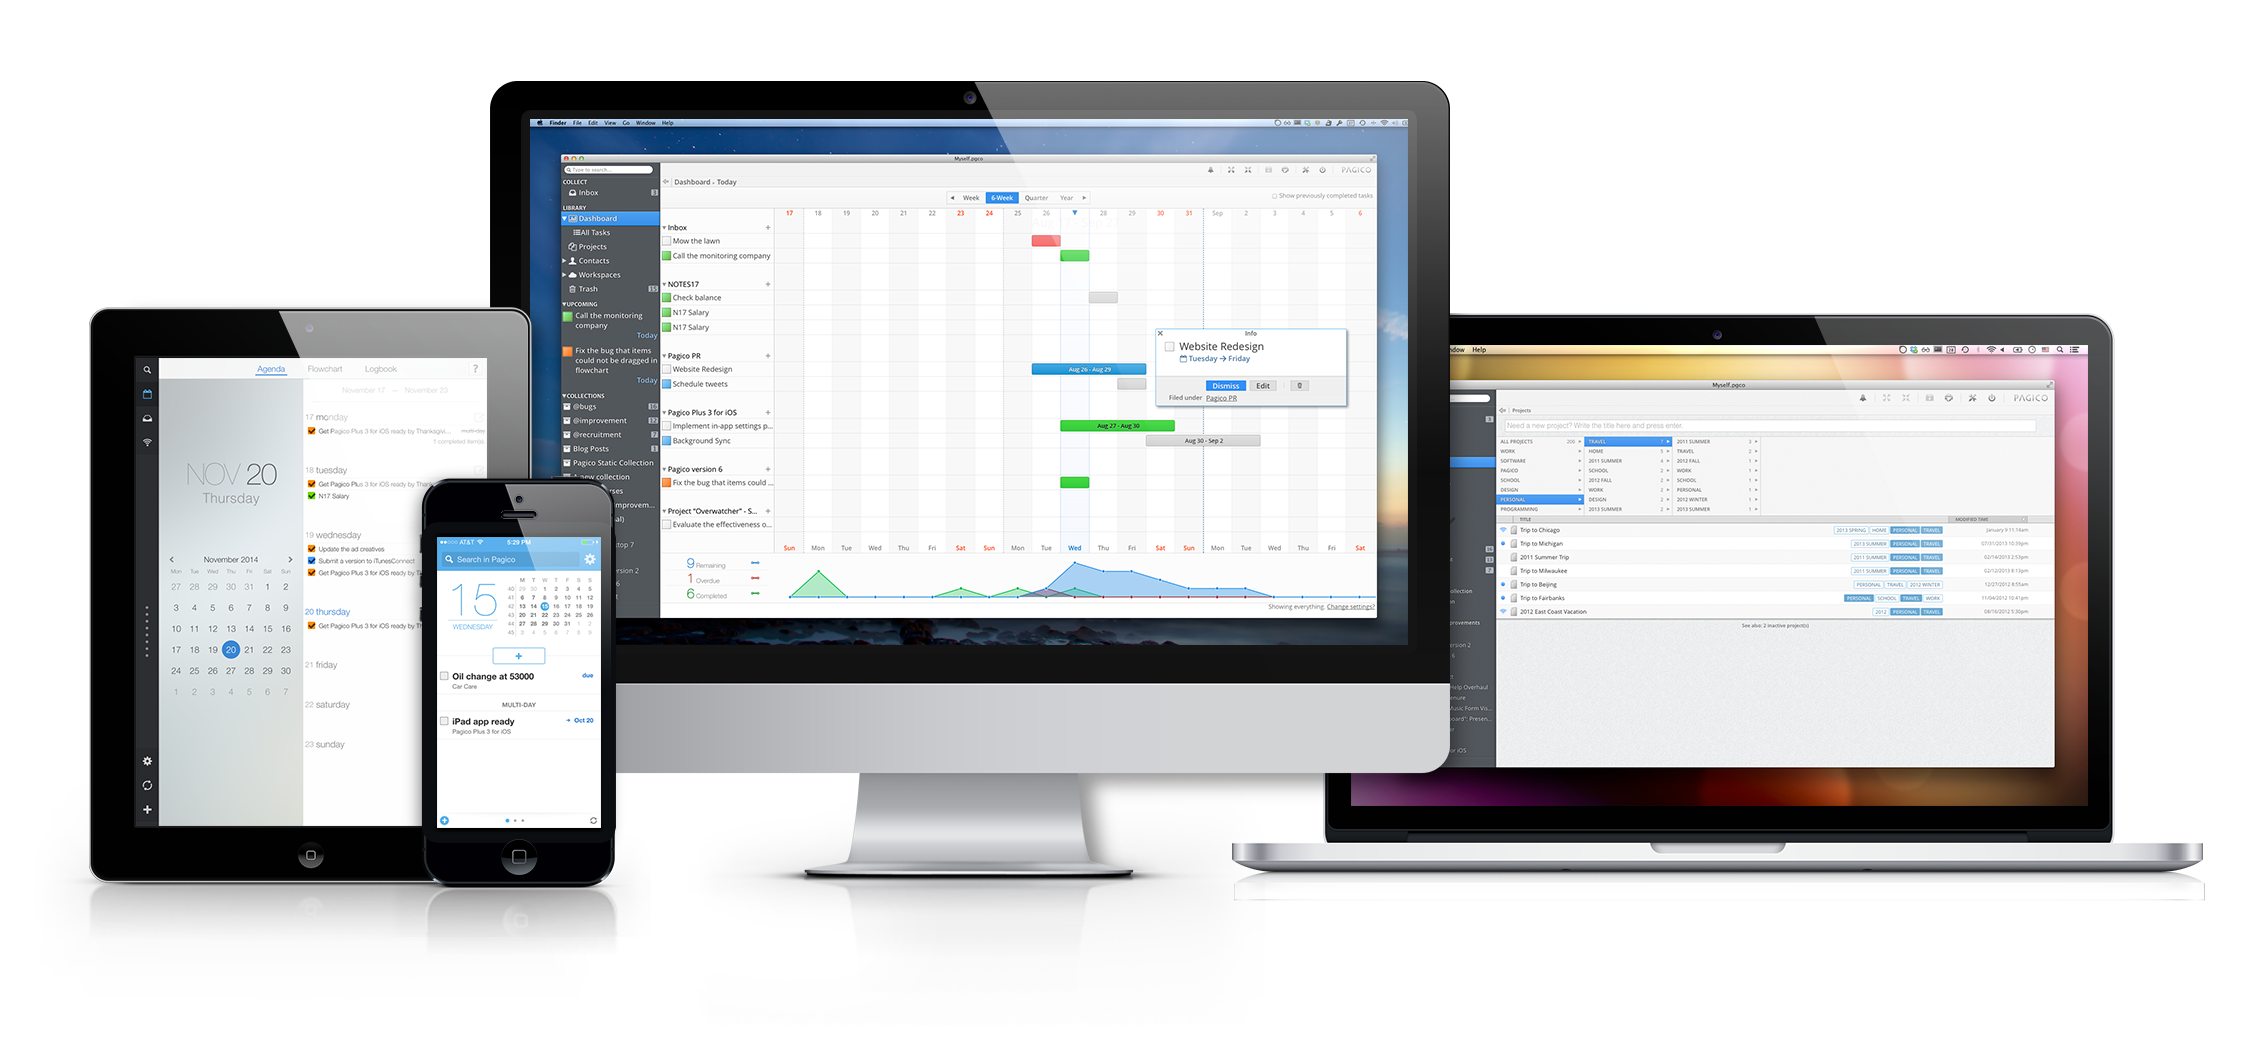
Now check out the flowchart. It’s like a Gantt chart but with none of the learning curve. You can get an overview of your entire schedule here, a perfect starting point of your day. This is a very powerful feature — with this flowchart, you will never miss a thing. No matter how things are scattered in different projects or clients. Everything will be intuitively presented to you, and you can reschedule things easily by dragging and dropping.
Connecting to your calendar app
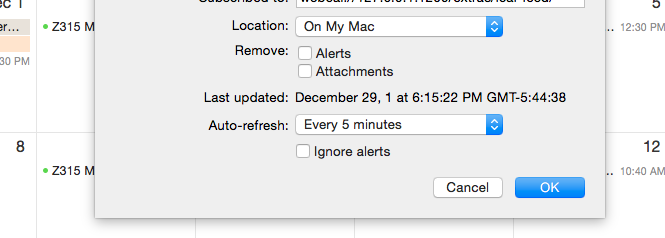
Now, where’s that calendar view, you might ask? Well, there isn’t a calendar view in Pagico. Instead, Pagico can easily connect to your calendar app. Click on the Settings icon in the toolbar, then scroll to the bottom. Under the “Extend your Pagico” section, click on the “Connect Pagico to Calendar App” button. Then your default calendar app should popup automatically. Follow the on-screen instructions and OK everything. Be sure to uncheck “Remove alerts & attachments” options, and enable Auto-Refresh.

Then you’re all set! Not only you’ll see all your Pagico tasks right in your calendar, you’ll also get all the alarms you previously set up.
Managing projects
Enough about the small stuff. Let’s start managing your projects. Click the “+” button at the lower left corner and choose “New Project”. Projects are like data containers that can store anything you have. Notes, tasks, checklists, and of course, files. Set a project title and you’re good to go. Try creating a few tasks (with due dates) in your new project, and return to the Dashboard to check out your informative schedule flowchart.
In Getting Started Guide Part 2, we’ll talk about the best practices in managing projects, including the use of tags, cross links, and collections.